Developing cool iPhone apps that solves real world problems is a dream for most developers. Even if you are currently not working on iOS projects or have not done so in the past. iPhones are powerful devices with infinite capabilities. When it comes to app development, your imagination is probably the only limit.
However, getting started is not as easy as you may think. Yes, there are numerous books and online resources available to help you out. But, there are very few that understands what a beginner need to know to get a clear idea on the basics.
Being confident about the basics is the very key to your future success as a developer. Understanding the basics will most likely create enthusiasm to continue and deep dive into the low level features.
We will create a personal expense manager app to explain the concepts described in this article. Without a real app example it would be difficult and boring to relate the concepts.
I will not discuss about Swift programming language syntax and semantics in this article. Please refer to Apple developer website to learn about Swift language basics.
Tell Me How To Begin
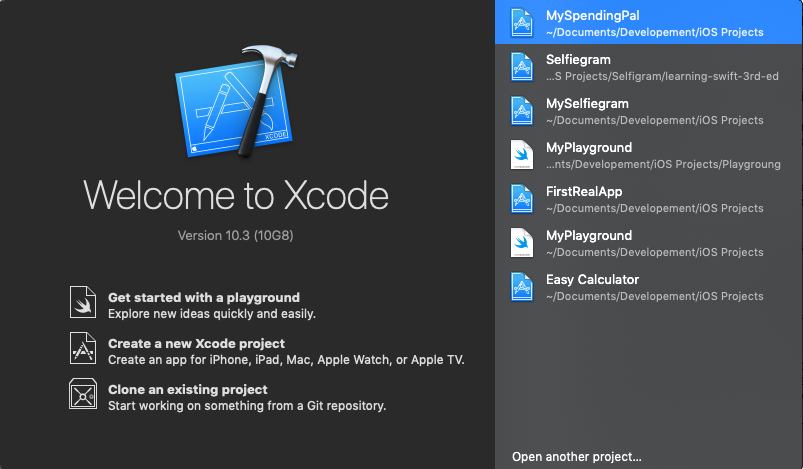
I have used iOS version 5 and Xcode version 10 for this example app. Please download latest Xcode version from Mac store to begin your journey.
Once Xcode is installed, launch the app from launchpad. I prefer to keep Xcode pinned to dock as I use this app frequently. Xcode will ask if you want to create a new project or want to work on an existing project. Select the option ‘Create a new Xcode project’.
Following screen will appear which will allow you to select the platform for which you will be creating the app (in our case this is an iOS app, but Xcode can be used to develop apps for macOS watchOS and tvOS as well).
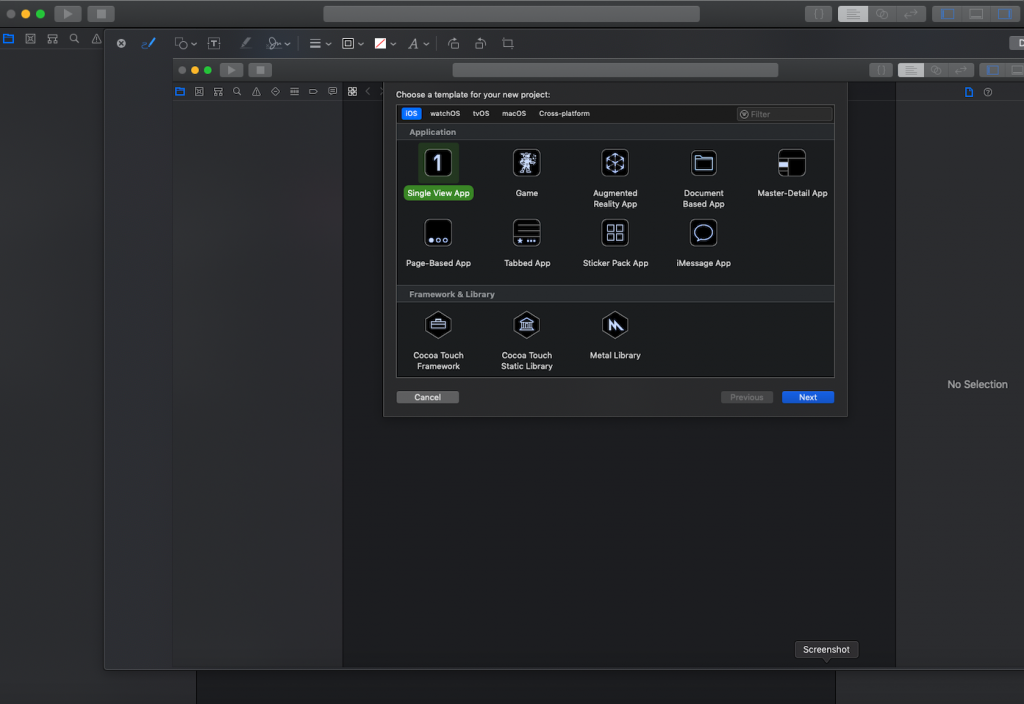
Select ‘Single View App’ option. This is the simplest template of the lot. Only thing templates do is to create the basic structure of your app to start your work based on the type of app selected by you. This is helpful when you are developing your first app.
But as you gain some experience you will want to create all files yourself. Unfortunately, there is no blank project template option in Xcode. So you have to delete/modify files created by Xcode when you are working on a real project.
Once you choose the template and select the next button, following screen will appear where you will need to enter basic details about the project you are going to create. We will discuss about the attributes presented here with their significance.
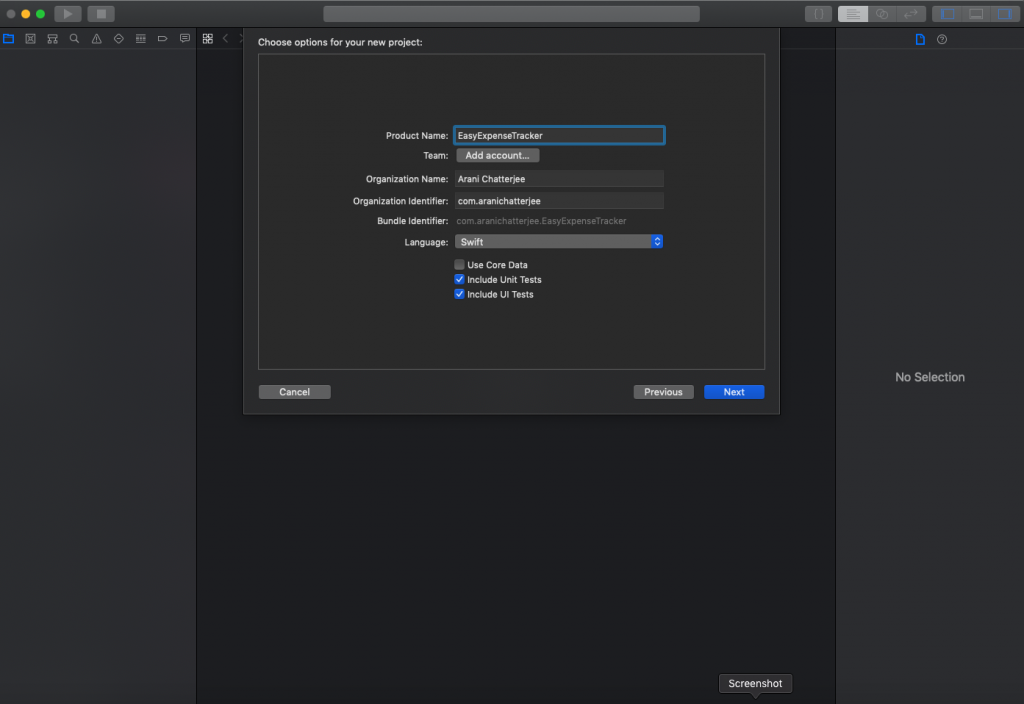
Product Name: This is theme of the app you are developing. This name will appear in the App Store when you launch your app. Name should be short and should relate to what it is offering to the users.
Team: Generally, an app development team will have more than one developers. But, there are lot of apps where a single developer does everything end to end. Here you can add Apple developer accounts for your team members including your own account.
For developing an app you may not add a developer account. But you will need one when you submit the app to app store for verification and publishing. As you are just beginning your journey as an iOS developer, don’t worry too much about this now.
Organisation Name: As the label suggests, this is the name of the organisation/company who owns the app. If you are an individual developer then just put your name here.
Organisation Identified: Organisation identifier is the organisation name without any space in reverse domain order. e.g in the screen shot above, organisation name is ‘Arani Chatterjee’ which is my name.
So, organisation name is automatically set by Xcode as com.aranichatterjee. Organisation identifier should be unique when you submit your app to App Store because Apple uses this to uniquely identify an individual or company distributing the app.
Bundle Identifier: This is the unique identifier for your app and is used to differentiate your app from millions of other apps published in app store. Bundle identifier is automatically constructed by Xcode by concatenating organisation identifier and product name with period.
Now we have entered all information and ready to move forward. Click on the next button and Xcode will ask to select a folder where the files related to the project will be saved on disk.
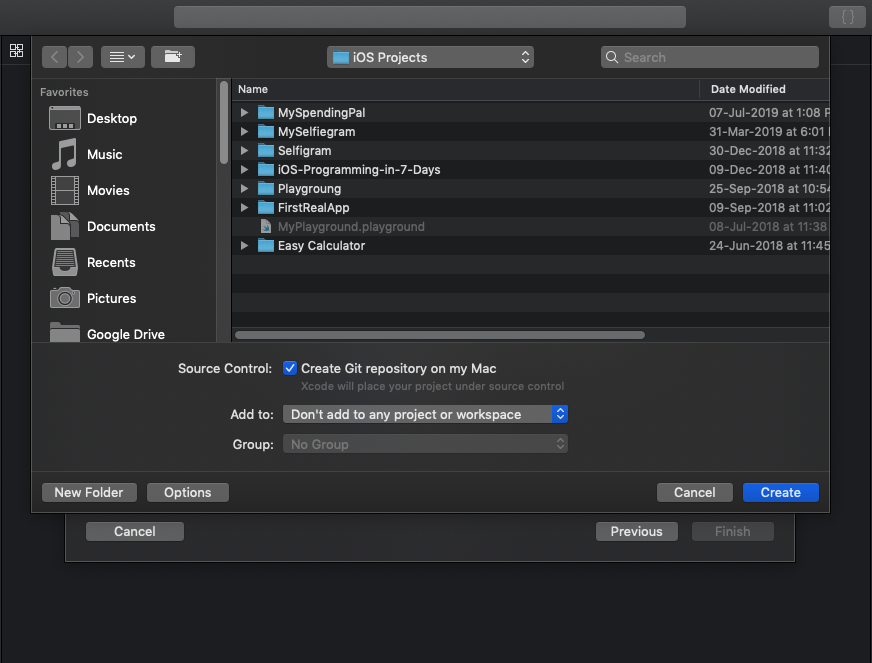
I have selected ‘iOS Projects’ folder as the parent folder. Xcode will create a sub folder named same as the project name entered (i.e. EasyExpenseTracker) to store the files for our project.
Please note the ‘Create Git repository on my mac’ option checked by default. You should keep this option selected as you must use a source control tool like Git to ensure you have the history of all changes and you can go back to a previous state if you need to.
Also if multiple developers are working in your team then Git will ensure that you get code changes committed by all developers in remote repository. I will not go further in Git in this article.
Click on the ‘Create’ button and Xcode will create the project structure and open the project navigation window with basic structure of the app automatically created.
Explain Me The Files Automatically Created By Xcode When The Project Is Created
We have selected single view application template for our project. Though this is the simplest template available in Xcode; but it will serve the purpose of explaining the basic structure of the application. For real life applications also I prefer to create all the views and controllers from scratch for flexibility. Following is the basic app structure created by Xcode.
As you can see from the screen shot, Xcode has created a folder ‘EasyExpenseTracker’ that contains the files required to run the app. Also two additional folder structure ‘EasyExpenseTrackerTests’ and ‘EasyExpenseTrackerUITests’ are created which contains files related to automated testing of the app.
You should always try to write automated tests for the code you are writing as much as possible. This way you can test your app automatically in a single click after every change you make in your code and be confident that it is always production ready.
Let us concentrate first on the files under ‘EasyExpenseTracker’ folder which are required to run the project. You can see that there are three types of files created. Two swift files, two storyboard files and one plist file.
Storyboard Files
Storyboard files contain the layout of the UI designed through Xcode UI editor. You can design iOS app UI by dragging components from component library and defining navigation flow between views by adding navigation controllers and segues.
Please note that everything that you design in UI visual editor can be achieved programmatically by writing code in Swift. Both the approaches has pros and cons; but let us keep that discussion for another article.
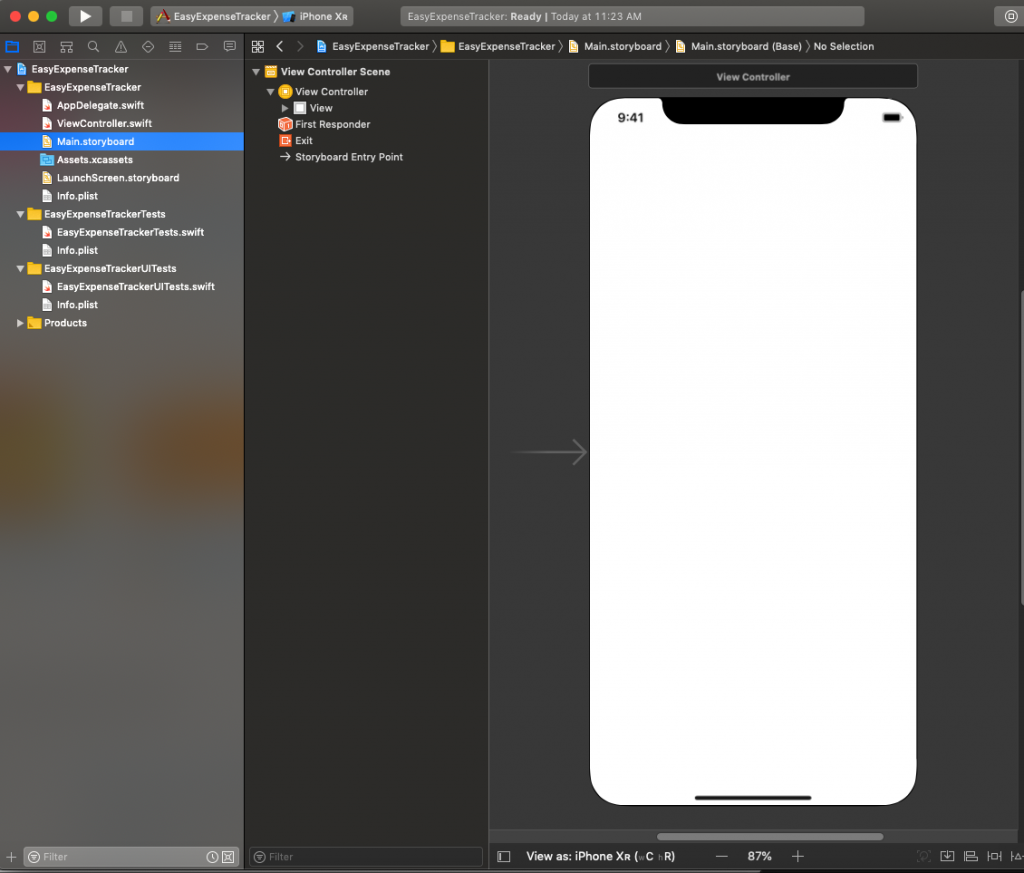
As you can see from the screen shot, Xcode has created two storyboard files. One is Main.storyboard and the other is LaunchScreen.storyboard. As the name suggests, LaunchScreen.storyboard contains the view that will appear when your application is launched.
This view will normally contain the logo of your app along with any tagline or background image. This screen will be visible to the user until your application finished loading and first view is presented to the user.
The other storyboard created i.e. Main.storyboard is the storyboard that will contain the actual UI views for your app. It would be better to clarify one point here. Your app can have multiple storyboards to logically group different features supported by the app. Main.storyboard is created by Xcode just as a starting point. You can add as many storyboards as you need.
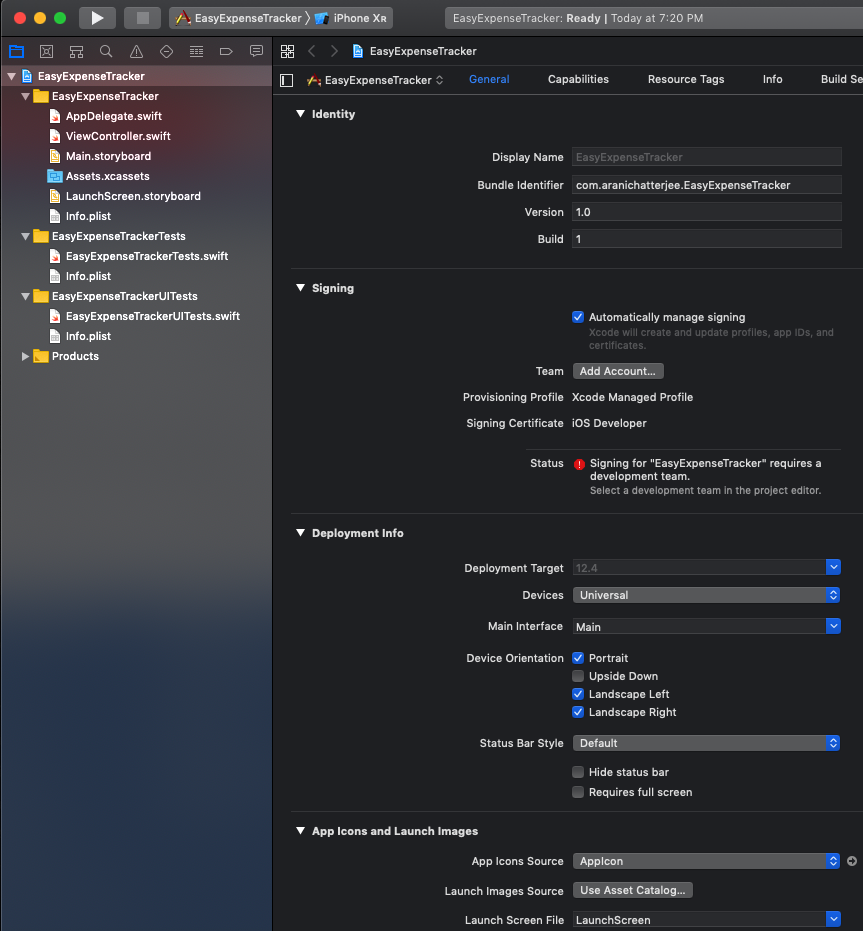
Now the question is if there are multiple storyboards, how will the Swift run time environment know which one to show when your application launches? The entry point storyboard can be set in ‘Deployment Info’ section under ‘General’ tab when you select the project as shown in screen shot below. You need to select the ‘Main Interface’ from the drop down list.
Similarly, launch screen storyboard can be selected in ‘Launch Screen File’ drop down option in ‘App Icons and Launch Images’ section. Please note that name of the launch screen interface and main interface can also be changed directly by editing Info.plist file created by Xcode.
Swift Files
Swift files contain actual codes (i.e. processing logic) that get invoked when the app launches or when users interact with different UI elements. As you can see from the screen shot, Xcode has created two swift files. One is AppDelegate.swift and the other is ViewController.swift. Let’s see what each of them does.
Once the application is launched, one instance of AppDelegate is created which contains different application lifecycle methods as defined in UIApplicationDelegate protocol. Notice the @UIApplicationMain annotation applied to the AppDelegate class which identifies this as the main application class.
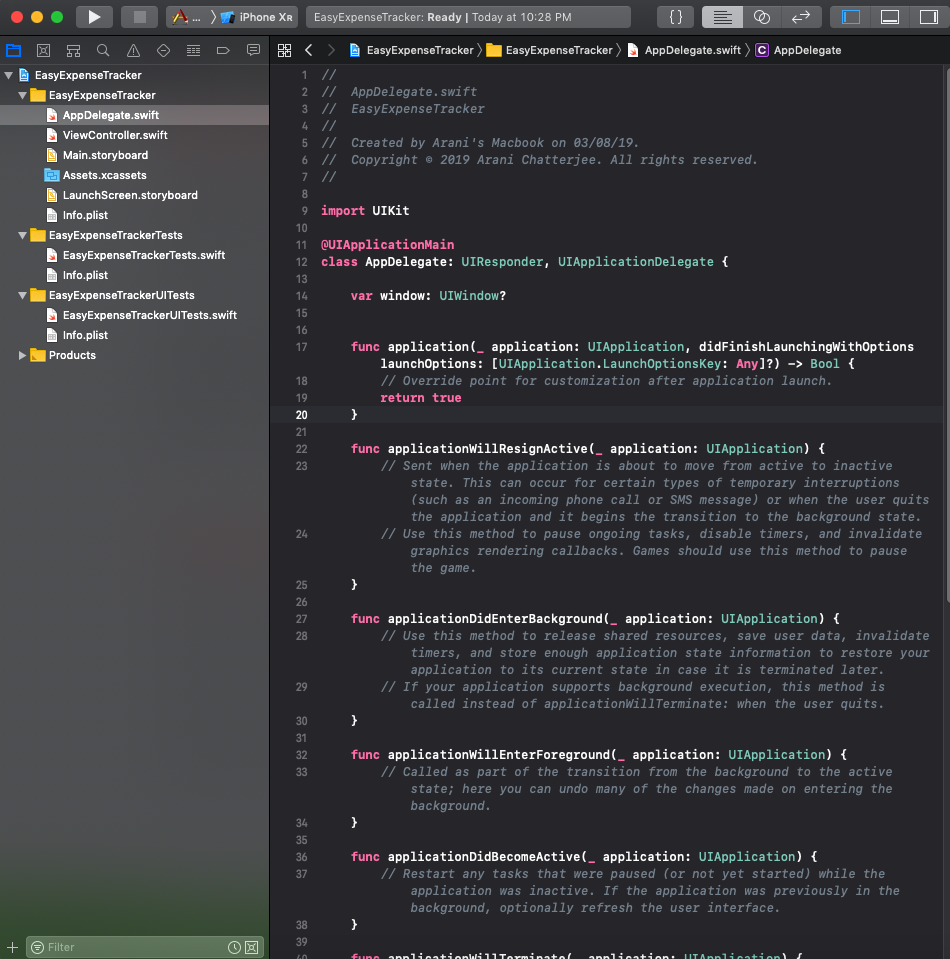
When the application is launched, following function is invoked. As you can see only code present in the function as generated by Xcode is return true. However, we can add our own code before return true statement as will be required for most real life apps.
Though we have not written any code here, Swift will identify the main interface from Info.plist file which is Main.storyboard in our case, create a WIWindow object and assign to AppDelegate. Also an empty view will be created based on the default ‘View Controller’ created by Xcode.
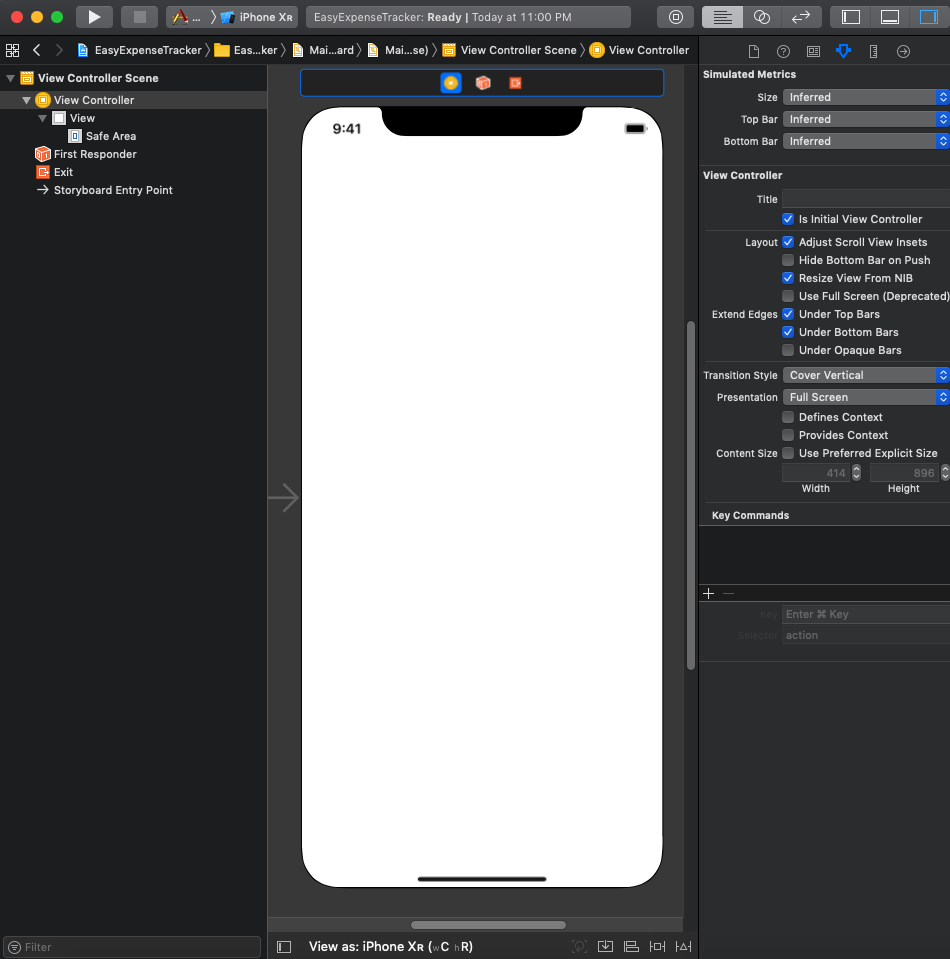
Please note that this is the entry point view controller for Main.storyboard. There can be multiple views and view controllers in a storyboard. But there will be only one entry point. Entry point view controller is specified by ticking ‘Is Initial View Controller’ attribute from attribute inspector.
Now let us check contents of ViewController.swift file created by Xcode. As you can see from the screen shot below, this is a sub class of UIViewController class. Every view controller must be a sub class of UIViewController.
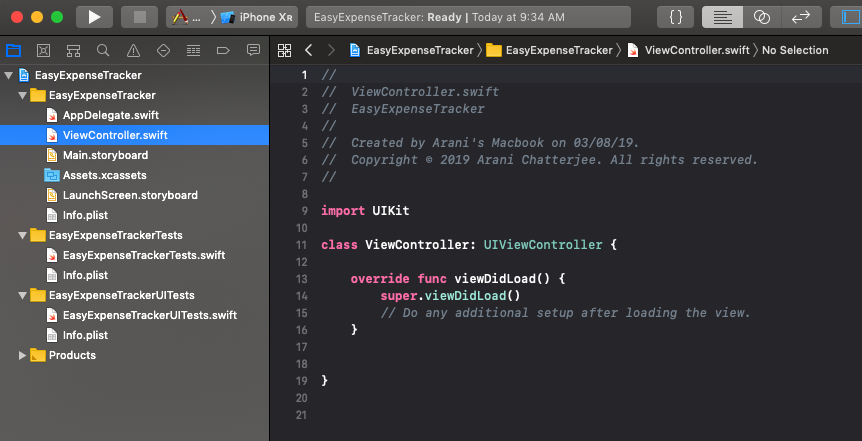
Another point to notice here is that Xcode has created a stub for function viewDidLoad(). This method is automatically invoked by the app delegate one the view is loaded in the window. You can write additional code here to manipulate the view.
Plist File
The third type if file created by Xcode is the plist or property list file named Info.plist. If we select the file in project explorer, we will see that some settings information are stored in this file. A plist file can be used to store configuration settings about the project.
As you can see from the screen shot below, values stored in plist file is in the form of key value pairs which is called a dictionary in Swift language terms. Data types for the values specified against the keys are String, Boolean and Array.
You can see that the name of the main storyboard file and launch screen storyboard file we discussed earlier are specified here.
Two other folders ‘EasyExpenseTrackerTests’ and ‘EasyExpenseTrackerUITests’ contains files related to stubs created by Xcode for writing automated functional tests and UI tests. We will not discuss about them in this article.
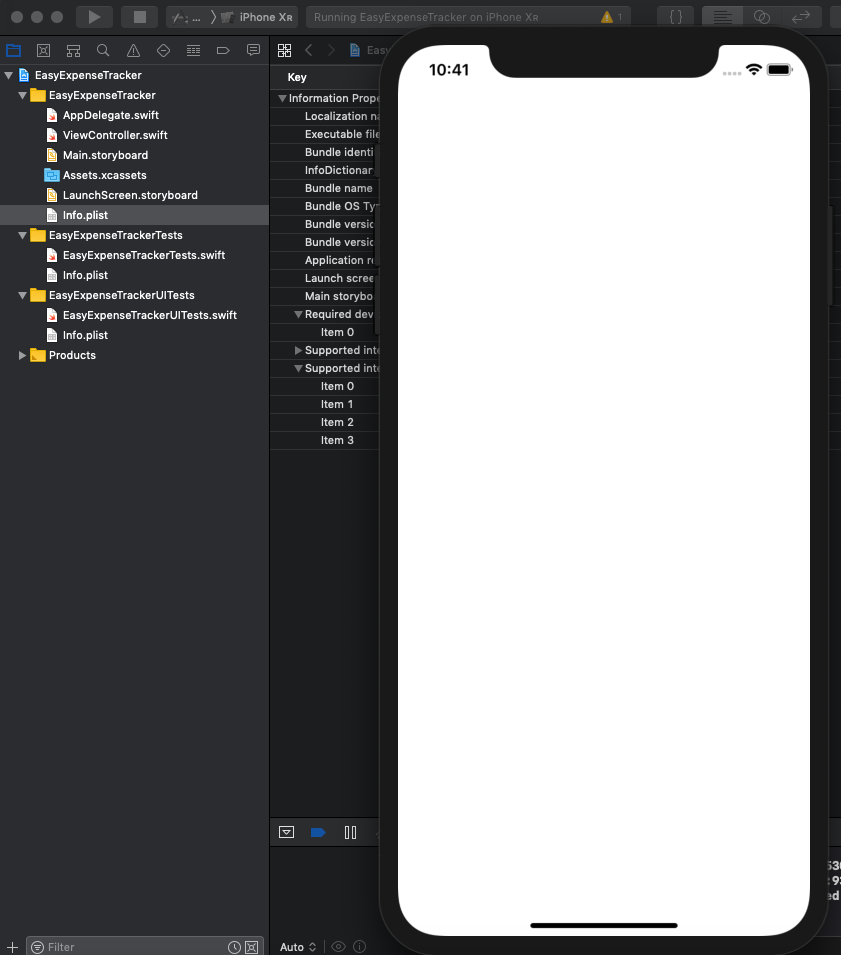
So, that’s it! You can now actually run the application by clicking on the build and run button which will build the app, run the tests and then launch the app if all tests are passed. If we don’t change any code and just run this template app, we will see the simulator firing up and iPhone screen displayed with a blank white screen.
In next few articles I will add new features to our expense manager app that can help the users track their expenses and maintain budgets. Stay tuned!


